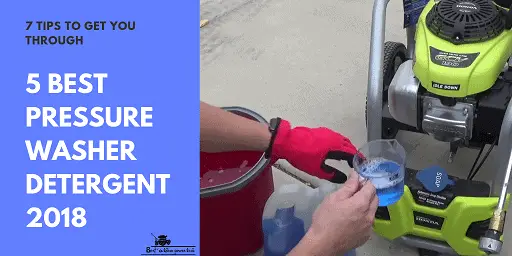
Years ago, when I had my first pressure washer and I was in a ‘get er done’ mood I used some laundry detergent on one of my cleaning projects.
Which was a mistake….your concrete driveway and your underwear don’t (or at least shouldn’t:) have much in common. There are delicate wash jobs and aggressive wash jobs and it only makes sense that they each require different chemicals. This of course isn’t a zero sum game. Just as you can wash your hair with bar soap, you will get better results with shampoo.
So it’s best to use a pressure washer detergent, and you’ll get good mileage out of a bottle, depending on the size of your project. See some top picks reviewed below.
Now another big factor, is water temperature. Just like washing greasy dishes, hot water helps. They do make hot water pressure washers but for most of us that’s not a choice. Doesn’t mean we don’t have other options, even with a standard pressure washer.
The popular Sunjoe SPX3000 has a max water inlet temp of 104 degrees Fahrenheit (typical max temp of a home hot water heater is 120 degrees Fahrenheit). So you could run some warm water through your pressure washer, but that would be complicated and no reason to push the max temperature specs of our machine.
Better is to have a bucket of hot water and the same detergent handy as we are working. Let the pressure washer do the majority of the work, and then scrub by hand any problems areas with the hot water mixture. Or even easier do a hot water pre-wash (ie: dump a bucket of hotwater on the driveway) to loosen things up.
There are not many pressure washer soaps, detergent available in the market so it is recommended to use concentrated detergent for the best result. Or you can also think about preparing something homemade.
If you are looking for a solution to clean your car with ease and without leaving any spot then this is the one you are looking for. When combined with the Karcher pressure wash and car washing system you will receive a perfect wash.
You have to buy this pressure washer detergent in 1-gallon size. But wait! This is highly concentrated which makes it very affordable as it makes up to 20 gallons of ready to use solution. This means only a cost of $1.15 per gallon (approximately). And you do not need a gallon to wash. This has very good customer satisfaction.
Furthermore, if you want to use your hand for those sneaky, hard to reach areas; don’t worry; it is gentle enough for your hand. This product will give you spot-free shine, leave no spot or residue.
When power washing your House and sidings, one thing that results in great difficulty is those tough stains from mildew, moss, fungus, algae. This unique product has a chemical compound that is called “SPOREX”. This special chemical makes it a tough contestant for those stains!
It can easily dissolve with the toughest stains from dirt, oil, grease, bird droppings etc. resulting in a nice clean surface. It also slows down the return of those stains keeping you tension free for a while.
This comes as concentrated in a gallon pack. Use this detergent with a 1:10 ratio of water. This way you can get up to 11 gallons of ready to use a mixture that covers 2000sq. ft.
This claims to be a biodegradable solution, making it an environment-friendly solution.
Simple Green products are always a good choice. And this one is very good for power cleaning your driveway and concrete. This one comes in 1-gallon pack size. When mixed with water it can make up to 11 gallons of cleaning solution.
This cleaning agent removes oil, grease, grime and most stains from concrete walkways, patios, driveways, sidewalks. It is also gentle for manual use.
This Krud Kutter Deck and Fence cleaner come in 1 gallon concentrated bottle size. Prepare a 1:10 concentrate mixture and put it on the pressure washer. Apply power washing with this on vertical surfaces of deck and fences covered with stains. Leave the solution to settle on the surface for 3 to 5 minutes but do not let the solution to dry. Remove the solution siphon and pressure wash with clean water.
This mixture is guaranteed to provide you with the best result. Removes grease, oil, tree sap, even gray weathering on wood.
This Simple Green product is an all-rounder. It can be used for multiple items around your home. Here is fun math! It takes around ½ oz. of this product and 31.5 oz. water to prepare a 32 oz. bottle. So buy once forget for the year! Check the price and do the math.
You can use it for cleaning almost anything! For your cars, lawn, patios, sidings this one is a good choice. This is also biodegradable. Although it is not odorless you can deal with it!
Ultimate 7 tips for final detergent selection
The difference between pressure washer soap and pressure washer detergent
Soaps and detergents are very similar in chemical properties still they a major difference. Soaps are formed by natural products like starting with fats and oils which are obtained from plants or animals. These are combined with high-pressure steam while producing fatty acid and glycerin. Combining the fatty acid with salt produces soap.
Sodium soaps are converted into bar soaps and potassium salt is used for liquid soap.
Soap breaks down when mixed with water or oil due to its hydrophilic and hydrophobic ends
When to use soap and when to use power washer detergent?
Soaps are biodegradable and do not possess a threat to the environment. But soap mixes with sodium and magnesium in hard water to create an insoluble mud type residue. This white residue can stick to your surface.
On the other hand, the detergent does not have this problem. The special benefit of detergent is that it is engineered for different cleaning surfaces.
The most effective solution is to combine the soap and detergent together.
How does a pressure washer detergent, nozzle and injector work?
This is a very interesting process! The proper blending of soap or detergent with the power washer water flow is very important. This introduction of detergent can be done in two ways. Before entering the pump (upstream) or after leaving the pump (Downstream).
Downstream pumping systems provide multiple options. This downstream injection system is equipped with a nozzle with a variable pressure adjustment capacity. A venturi injector is used for making a pressure differential which will draw the pressure washer detergent from the container into the system.
In the upstream delivery system, a float system is necessary to produce zero pressure which delivers the chemical into the system. So the downstream system allows more option for chemical delivery.
Is pressure washer soap, detergent or other chemical solution safe for your environment?
Pressure washer detergent and other chemical solutions must be environment-friendly as the chemicals mix with the ground which will mix with rainwater underground. So be sure to check the label if it is biodegradable.
Cleaning is good but you need to take off your environment too!
Difference between Residential and Industrial pressure washer soap, detergent and other chemical solutions and which one to use?
The math is simple. Industrial things like pressure washer car soap come in large barrels. Industrial pressure washer detergent is supplied in concentrated condition. And the residential grade comes in pre-mixed condition.
If you pressure wash around your home a few times a month then you should go for the residential pressure wash soap or chemicals. Buying a residential pressure washer detergent like vinyl siding cleaner will cost you some extra bucks per gallon. At least you do not have to worry about diluting the concentrated chemicals.
And finally, if you pressure wash for living the industrial range is for you. Why? It comes in a large barrel and concentrated. Just use when you need it. This will save you some money.
What kind of soap to use in pressure washer [Foam or no foam?]
If you love to play with foam then choose carefully. Let’s discuss here. First, read the label on the pressure washer detergent bottle. Some of them can cause little foam. If you want less foam its good! On the other hand, if you want more foam then using foam cannon might be a good idea.
Using a foam fun party to wash your car is a great idea!
Your detergent might not be able to provide you with a foam fiesta you are looking for. You know what? I love the view of a car covered with foam.
There are some pressure washer soaps available on the market. A foam cannon combining with a pressure washer is a great combination.
You may consider my opinion. Less foam for your driveway and more foam for your cars!
Thinking about an eco-friendly pressure washer detergent is excellent. Although, you may not get the same result as you will get with a chemical detergent, yet let’s try this.
This requires some crazy simple ingredient for preparing a homemade detergent that works. Mix 2/3 cup of household cleanser powdered with 1/3 cup of phosphate-free laundry soap. Mix these with a gallon of water.
The mixing has to be proper for a good result. Pour this solution in the pressure washer detergent tank and start cleaning.
You may have to use this process more than once to get a good result. Mildew buildup can be a challenge for this detergent to overcome. To get over this you can use vinegar on mildew.
This is helpful for plants, keeping them away from chemical detergents.
Before I Let You Go
Using some good detergent with a pressure washer is a solid way of getting a good result.
And you can also try making something of your own at home. This might not be as powerful as the chemical ones.
I suggest not to use hot water unless you have an industrial pressure washer. Pressure washer detergent or soap is excellent for removing grimes.
If you’re here because you’re going to wash your vinyl siding, you might also like our article on best siding cleaner.
The primary reason behind writing this article is eliminating the confusion on “how to adjust foam cannons” by sharing my real-life experience.
There are two types of foam cannon users.
One that posts epic foamy car wash videos on Youtube and the other comments on the video “how to make foam cannon more foamy?” People asking these are seeing just soapy water with their foam cannon.
That’s frustrating. I know that.
Just stay with me for two minutes reading this article. I am going to share what mistakes you are making and how to fix them.
Also, I’ll share the adjustment procedure of cannon and the perfect foam cannon soap ratio.
I think it’s better to follow the backward process for learning a process. Let me show you the mistakes you might be making with your foam cannon.
Avoid these mistakes and do the correct things mentioned.
1. Are You Using The Wrong Pressure Washer?
Foam cannon is directly dependent on PSI and GPM.
No matter the pressure washer is electric or gas-powered, a foam cannon requires a minimum PSI and GPM. Fortunately, you can find the requirement of specific PSI and GPM on the instruction manual of foam cannon. In addition, you can also find that information in the product description section if you buy online.
PSI and GPM are the two factors responsible for sucking up the soap and mix it with the water. Furthermore, these factors also produce a suitable soap mixture for foam.
For example, if you own a foam cannon that requires 1.1 GPM water surely it won’t work properly with a 1.0 GPM water supply.
As a result, you are kind of forced to select a pressure washer that meets the foam cannon requirement. However, selecting a pressure washer depending on the foam cannon is hilarious. Having said that, I got some pressure washers for cars reviewed in this article.
You better buy a pressure washer of minimum 2000 psi and 1.4 GPM for foam cannon usability and think no further.
2. Are You Using The Proper Soap?
Once I saw someone using washing machine detergent in foam cannon. Turned out crappy!
Don’t be stupid like that guy!
Car soaps are good for foam cannon. But even a good car soap can sometimes be tricky for more sud. And less sud means low foam.
To focus on foam, some manufacturers produce specialized foam cannon soap. Surely, these soaps are king of sud. More sud means more foam.
Personally, I like the concentrated soaps as they give you full control of mixture. Specialized soap for foam cannon will mix with water properly and later produce thicker foam.
Using the wrong soap ratio can be another good reason for watery foam.
However, the perfect soap ratio does not exist. The ratio can differ regarding the soap brand, the bottle size, and water quality. Furthermore, once again your soap ratio need to match with your pressure washer’s GPM and PSI.
Clearly the ratio depends on trial and error method. As you can see, the ratio is dependent on several things which can only be achieved by trial and error method.
Regardless of the different variables, there is some kind of universal ratio that I am going to share with you.
I personally use 2 ounces of soap with 10 ounces of water.
However, experts suggest using 1 ounce of soap with 10 ounces of water. Filling a bottle with water where you have 1 ounce of water is not a good idea. This way the mixture will be very much soap less.
On the sweet spot, use 1 ounce of soap wit 10 ounces of water.
Here’s a video on soap mixing hack:
4. Wrong Orifice Size
Another tiny but crucial point you might be missing out is the orifice size, which is a tiny hole on the nozzle screw set.
There are usually two sizes of orifice available. 1.1 mm and 1.25 mm (hole size).
1.1 mm orifice requires a minimum of 1.4 GPM and 1100 PSI of water pressure.
1.25 mm orifice requires a minimum of 1.8 GPM and 1100 PSI of water pressure.
In the USA, as the electricity is 110v, the electric pressure washers are of quite a low capacity. To be compatible with it, you need to use a 1.1mm orifice size.
On the other hand, if you own a powerful pressure washer you might want to opt for a 1.25mm orifice size.
Having a bigger orifice size with a low PSI and PGM pressure washer is only going to result in watery foam.
You can easily change the orifice available online. Also, you can play with the adjustment knob.
5. Is the Orifice Dirty?
Not only the orifice size matters but also a clean orifice too.
A dirty orifice can only result in a blocked or inconsistent supply of foam. This can also hamper the suction of soap mixture from the bottle.
If you are thinking about how an orifice can get dirty, then, think about your basin sink. Kind of like that.
Soap residue can create a thick layer around the orifice hole and cause a blockage. Moreover, dust can also be a hindrance here.
No matter how limited your use is, it is recommended to clean the orifice once a month.
Here’s a video on taking care of your foam cannon:
6. Quality Of The Foam Cannon
No matter how hard you try to be precise with the foam cannon soap ratio or PSI or GPM, quality of the soap; a quality foam cannon is always going to be on your side.
A $15 foam cannon will never be the same as the $90 foam cannon.
But, I am not asking you to buy the $90 cannon nor the $15 one. However, you get what you pay for is absolutely true.
As long as you have the right orifice or soap, I assume a $15 is not going to be a problem for you.
Final Thought
As discussed, if you can match any of the above issues with your foam cannon, that’s what you are doing wrong. Please read carefully about these and do it perfectly.
No doubt, a foam cannon with proper performance will give you the best car cleaning experience. Just get your gear and make the proper mixture
Foam cannons leaves a thick foam mixture which won’t run off easily, so you do not need to dip sponges constantly into a bucket of soap.
That’s why a foam cannon is an insanely awesome invention for car cleaning. And you just got a healthy reason for getting the best foam cannon for your pressure washer.
However, creating thick creamy foam with foam cannon is not as easy as shaking the shaving cream bottle and having a fluffy foam.
I agree with you, a pressure washer with water or a bucket full of soapy water is going to do the washing.
Yet, there is a high possibility of some dirt and mud leftover on the paint, which can cause a scratch in the process of using a wash pad.
Pressure washing your car with plain water gets your car pretty clean in the first place. Using a foam cannon right after it allows the foam to settle down with the dirt or mud on the surface.
To be specific, this process lets the foam soak up the dirt and grime a lot longer, ensuring extreme cleaning of your car. On top of that, using a foam cannon instead of a foam gun is way better with a pressure washer. I’ll get to that later.
In addition, the foam can remove the stuff that you can’t even see which may be missed by the pressure washer. A pressure washer can remove most of the dirt but not all of it.
To cap it off, foam cannon makes lots of foam that grasp all the dirt in it without leaving any detergent soak mark. And, really this looks cool!
On this day, there are tons of models with different advantages to make you confused. In this article, I listed out only some great foam cannon reviews.
Listing the very best ones was not easy, but I did. Let’s jump right in!
Since its inception in 2015, Dusichin has been manufacturing quality car wash accessories, based in China.
To continue with that, DUSICHIN SFL-001 grabs the crown of this foam cannon top pick. This one is manufactured by Smartpainter.
Key Points at a Glance:
Brass connectors
Adjustable mixing knob
Durable according to the budget
Opaque bottle for the visual level of soap
Min PSI 1100
I have always considered a foam cannon under budget yet good promise. This one just complies with this point. A good foam party in a budget like no other.
The recommendation was made super easy with the two major feature it offers. First of all, the connectors are made of brass, which ensures a tighter connection with your pressure washer. That is how it helps you to save all the water pressure.
Secondly, you get a 33-ounce bottle to contain your car wash soap mixture. That is going to be enough for washing a couple of cars several times before next refill.
On top of it, there is a mixture knob to ensure proper mixture of car wash soap and water. The mixture is so accurate by this process, which later converts into a thick layer of foam with pressure washer spray.
The product is well built for professional category use. However, there are few concerns about the longevity of this bottle or whole setup around the neck. I agree there are some actual complains about the bottle breaking, but I did not get any problem like that.
Adjustable spray nozzle with a spray pattern controller
Minimum 2.0 GPM to maximum 5.3 GPM of water flow
Minimum 1000 PSI to maximum 3000 PSI pressure washer
Maximum 60°C water temperature
1 Liter bottle capacity
Using less detergent in the bottle works just fine with the pressure washer. Which means, you save a good amount of soap at the end of the month.
This foam cannon is quite familiar with the model I discussed above. The foam lance and main body are made of solid brass and quite heavy. That means no rust, durable great connection.
Other things are quite similar to the earlier DUSICHIN model. Adjustable spray nozzle and bigger bottle for more soap are two of those similarities.
The long tube at the end adjusts the width of the foam spray coverage. You can choose how pointy or wide you want the foam coverage to be. However, wide coverage clears up the bottle quickly.
This adjustability in the foam lance core makes it flexible to perform some additional jobs around your home. Like motorcycle washing, driveways, roofs, sidings and so on. This is built for professional use too.
Rotating the top knob to clockwise direction allows more detergent to mix with pressurized water spray. This will result in thicker foam. The duck-bill paddles inside the nozzle determine the pattern of spray.
Before being acquired by Goldeagle Trinova produces automotive detailing chemicals and after the acquisition, it just got better. They are producing some great automotive detailing chemical and many kinds of protective solutions.
This foam cannon can be nothing but a great one according to the company profile.
Key Points at a Glance:
Unique wide neck design
Solid premium build quality
Top quality brass material
Easy to use
Minimum PSI 800
This premium category foam cannon introduces a wide neck that prevents it from unexpected breakage. Trinova is a brand of high performance so is this product.
Their Brush connectors are great furnished and come with a premium grade foam nozzle. Even their hinges are unique that feels more premium.
However, I found the bottle is smaller than some of its competitors but enough for two car wash in a row. Increasing or decreasing the amount of foam is just as easy as playing with a stereo sound wheel. This small bottle does not allow more PSI than 3000 and no garden hose is adaptable.
Holding the foam cannon will make you feel a premium product. This is not going to let you down with the performance too, which is premium as promised.
With a premium finish and wide neck, this foam cannon is going to last a longer life than others. That is why this is a good deal for you.
Chemical Guys is the provider of the highest quality car chemical provider and they have this one for you. They are dedicated to car cleaning solution and accessories.
Key Points at a Glance:
Air injection technology
Comes in a package
See through, 32 Ounce bottle
Thick foam guaranteed with the proper soap mixture
Minimum PSI 800
One thing everyone has to take note off that chemical guys offer this product in a package. So if you go for this package you get a honey dew snow foam cleanser. On top of it, there are other package choices too!
No matter the package is, this TORQ foam cannon is ready to wash your car in every possible way. Their unique air injection system produces some real thick foam.
They claim to have a thread lock system design to protect the bottle head from getting broke against brass. However, I don’t know why there are some complaints about the bottleneck being broken.
With a large see-through soap bottle, you are about to get some good amount of snow foam that has a citrus smell to hypnotize you! However, this bottle is reported to work better with more than 2500 psi pressure washer jet.
All these features with a branded expertise cost a bit more than others. But, you get a premium product that is truly well worth of investment.
Honestly, I do not have any idea about the Fasmov brand and its origin. But, this thing does exactly what is supposed to do! Great foam wash, nothing less, nothing more!
Key Points at a Glance:
Brass connectors
Large 1 liter (32 ounces) bottle
Adjustable knob
Sturdy cannon for prolonged use
I did not find any kind of brand logo on the bottle (unbelievable), which is a pure white color. To knock it off, this item just covered my car with super quality foam. I just want to say, regardless of the brand, it can dominate over the branded models.
If you do not want to spend extra bucks just for some fancy brand with the same result (no one does), then this is something to have a look at.
The bottle is well built to take a good amount of pressure. Equipped with brass connector just like the top products. Typically 1 bottle of a 1:10 dilute mixture of soap concentrate is good for 2 or 3 cars before the next refill. This is true for most of the models.
MTM Hydro, based in Italy, is the trusted manufacturer of hydro foam cannon. They produce great products for automobile detailing as well as pressure washer parts.
Key Points at a Glance:
8 – 5.3 GPM
Adjustable fan blades (Foam jet angle)
Large bottle
Also good for home cleaning
Someone, who wants a professional foam wash in a budget must consider this one. This is surely going to give you a feel of high professional foaming touch in a short budget.
Ideal for a 3000 psi pressure washer with a maximum range of 5000 psi pressure washer. The main issue, GPM is a maximum of 5.3 GPM and minimum of 1.8 GPM to suck the detergent.
Adjustable fan blades are present for wider and pointy foam angle and a knob (as always) for foam thickness control. In addition, the combination of power and GPM can cut serious grime from your car.
I do not recommend this for T type connector as they won’t fit. Rather than that, this is also made with a brass connector to stay on top. However, there are very negligible complains of rust issue.
I have known Foseal for wi-fi car data diagnostic reader, then I found this, a foam cannon. This foam cannon is really great! If you do not want to pay extra bucks on Chemical guys (neither do I), you need to consider this.
Key Points at a Glance:
Brass connector
32-ounce bottle
Good strong bottle
The soap adjust knob is of brass (super interesting!)
I cannot ensure the brand value except the great quality I found. With a 32-ounce capacity bottle, it starts throwing out foam starting from 1000 PSI. That is a decent size bottle like the fancy brands have.
This produces a thick layer of foam under a decent amount of price tag. Regardless of the price tag, the bottle is quite tough. On top of it, they have a brass connector for zero water spillage.
With the save money be happy tag, this sturdy piece lasts a while. With the 1/4” quick disconnecting nozzle this is easy to use too. Combining with a good pressure washer and perfect nozzle fit this is capable of competing for any professional grade foam wash.
I have mentioned a few brands that are up to the mark. Yet, you should consider some steps before ending up with a wrong one in the process of selecting the best cannon.
Also, I am going to disclose the secrets for taking the best advantages of a foam cannon.
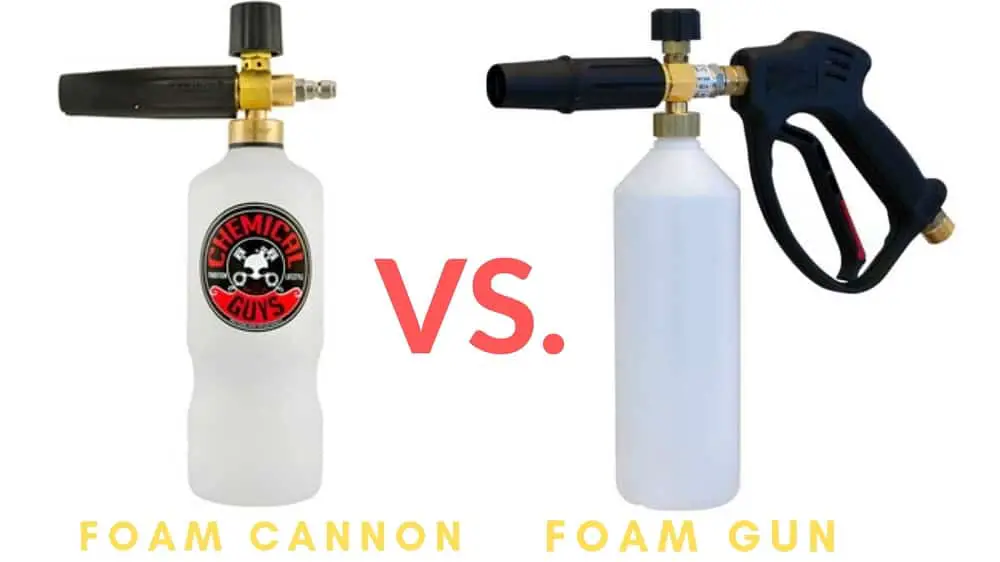
Foam Gun vs Foam Cannon: What Are The Differences?
You have already noticed or you knew about foam gun, which we are definitely not talking here about. So, you might be wondering what the actual difference between these two is?
Well, yes, there are some certain differences in outlook and features. And the main thing that makes them different is that one is a gun and other is cannon (!).
To be more specific, the foam gun fits with a typical hose. This makes it simpler to use but with some limitations.
As it fits with a garden hose the force or pressure it generates is disappointing to mention
You can understand, using low-pressure water extensively, this can only generate some foam which is really weak. The foam it generates won’t stay on the body and quickly runs off.
However, using low-pressure water does not mean less water. In practical it ends up using a big amount of water, which is a total waste.
As you already know, pressure washer uses huge pressure to generate water power. This pressurized water sucks up the detergent from foam cannon and mixes up with air to generate a thick layer of foam.
This sounds like using some extra setup like brass connector. This extra setup makes it super easy to set up with a pressure washer nozzle, just like a tap in! There are some great features too:
Generate extra thick layer of foam that does not run off. Which ensures super cleaning, like a professional car washing. The thicker the foam layer, the longer the stay, the premium finish is easier to get.
High-pressure water ensures the use of less water and soap yet a proper foam thickness. This makes foam cannon more efficient over foam gun.
If you have a car full of dirt and grime, using a foam cannon is wise than using soap and towel by hand all over your car. Foam it up and sit tight.
I always use a foam cannon and forgot the bucket full of soap and towel for wiping. Just foaming it up from the first step makes me feel a lot relaxed.
The Best Soap for Foam Cannon
One more thing people suffer to decide is foam cannon soap.
While buying this item all you need to consider is the thickness and great suds. A product that should not damage the car paint or wax protection but wash away all dirt and spots.
A soap that does not leave water spots is also a good one. However, shuffling from all the products available in the market and finding the best one is tough.
Here’s a quick pick of best one, keeping in mind the above-mentioned features of a good foam cannon soap.
This is controversial, whether you need to pre-wash before foaming up or not. However, let me assure you, there is literally no problem if you skip pre-wash.
The purpose of pre-wash is to remove the hard speck of dirt or debris from the surface. This keeps you on the safe side from making a scratch on the paint job. However, this is an extra step when you have only a pressure washer to work with.
Now, with a foam cannon you can, there is no need to pre-wash with plain water which saves a good amount of time. All you need to get started is a foam cannon and a pressure washer.
Start using the pressure washer until the air is purged or the foam comes out
While the foam is sprayed on your car, remember to spin the foam volume control knob for foam thickness you desire. There is also a plastic adjustable nozzle to control the angle of foam spray.
Here’s a video describing how to wash using a foam cannon.
The next step requires you to let the foam sit for a couple of minutes. This way it can grasp all the dirt and mud from your car easily.
Now, finally, take that dirt from your car! Use a pressure washer to work with the water jet from top to bottom. You do not want to blast dirt up onto the car from the ground by washing from bottom to top.
By now, you should see a shine on your car. Leave as it is, let dry and use a car wax for stunning shine like a pro.
How Does GPM Affect When Using Foam Cannon
A hard question but the answer is simple.
I know, this is hard when you notice your pressure washer has a GPM lower than the rated GPM of your newly bought foam cannon.
Don’t just throw them away. Because they would work properly. All you need is to switch to a small orifice.
Fortunately, most of the manufacturers pack them together. If it does not include in the package, you need to order them separately.
Maintaining You Foam Cannon
This might sound weird to you but this is essential.
People tend to (including me) through away and forget their foam cannon after the washing is done leaving soap mixture in the bottle. This generates a calcium sludge that hampers foam generation.
This situation can also reduce the pressure that it needs to operate.
You can already understand this is absolutely mandatory to empty and clean the foam cannon before putting it away for a long time.
Frequently Asked Questions
How much PSI does a foam cannon need?
Typically, the majority of foam cannons will require a PSI of between 1,000 and 3,000 PSI to be able to operate as they are supposed to. The number increases depending on whether you want a foam cannon that is light or heavy-duty.
Most light and medium-duty foam cannons will require a PSI of between 1,400 and 2,500 and anything between 2,500 and 3,000 PSI would be classed as heavy-duty.
Different foam cannons will require different PSIs and there is no correct answer for them all, so you must double-check the requirements for the specific foam cannon that you are considering purchasing.
That way, you can align the PSI needs of your foam cannon with the power washer specifications to ensure that your foam cannon will be able to complete its job correctly.
Is a foam cannon worth it?
In short, yes a foam cannon is definitely worth it. While there are a wide variety of other excellent ways to clean your car, nothing is quite as good as a foam cannon. Other types of cleaning methods will get your car looking clean, but foam cannons are also able to retain the new shine which cars have.
They are also great for use before you wash your vehicle with other methods as foam cannons can blow away dirt from your vehicle without causing any scratches or damage.
Other types of cleaning methods will also remove this dirt, but the scrubbing actions often included in this can cause the dirt to scratch your vehicle.
So using a foam cannon not only retains your car’s shine but also prevents it from unnecessary scratches, so a foam cannon is definitely worth the cost for the results that they produce.
What is the best pressure washer for a foam cannon?
The best pressure washer for a foam cannon is the Sun Joe SPX3000.
Yes. But elbow grease is still sometimes necessary. The foam cannons true value is in cleaning with out causing micro scratches on your cars finish.
Are all foam cannons the same?
While there are a wide variety of different foam cannons available, you will quickly observe that the majority of these products are actually the same.
Despite how excellent they are, foam cannons are actually a fairly basic product and so it is unsurprising that there are not many differential features between competitors. In fact, one of the only clear differences that you will notice between foam cannons is often the name of the brand that is selling them.
This is because the majority of foam cannons are manufactured overseas, and quite a lot of them are actually produced in the same factory and then sold under different company names.
As you look through foam cannons, it is very difficult to find any differential factors between them as most foam cannons will complete one simple job, so don’t be surprised if there appear to be no out-standing features for each device as this is often the case with foam cannons.
How do you use a soap cannon with a pressure washer?
Pressure washers are a very important component of using a soap cannon, and while it is not always essential, it is the best way to get excellent power when using the soap cannon.
It is important that you use a pressure washer that has a PSI that is suitable for use with your soap cannon. Once you have ensured this, you can then connect your soap cannon to your pressure washer.
You can do this using the hose that is connected to the pressure washer, and if need be you can use an extension hose to extend the distance between the soap cannon and the pressure washer.
But connecting your pressure washer to your soap cannon is very simple, all you have to do is connect the hose and you are good to go.
Do you need special soap for a foam cannon?
There is a special type of soap that you need for a foam cannon, but it isn’t as special as a specific brand which is the only one that is compatible. As long as you have a highly concentrated soap then it will work well in your foam cannon.
While it is advised that you use a highly concentrated soap, you will need to dilute these soaps down before using them with your foam cannon.
It is important that you use a highly concentrated soap as the weaker options will not be able to produce a thick foam when added to the cannon, leaving you with liquid rather than the shaving foam texture you may desire.
But as long as it is highly concentrated, there is no specific or special soap that you must use for your foam cannon, giving you lots of flexibility when buying.
How do I get more foam out of my foam cannon?
There are a few ways to get the most foam out of your foam cannon. To get more foam you can select the best pressure washer which has a perfect PSI level for your foam cannon, you should also choose a good soap formula, ideally, one that advertises thick foam.
As well as this, to get thicker foam you should also use warm water as this is better at activating the suds into a foam.
Finally, you should rinse your car before you start using the foam cannon for the best results. If you do all of this and keep up excellent maintenance of your equipment then you will get more and thicker foam from your foam cannon which is more satisfying to see and better for cleaning your vehicle.
Part of a video titled How to get MORE FOAM from your Foam Cannon | Car Detailing
A cheaper foam cannon can be very tempting, and in general, they are very good value.
But one issue with cheaper foam cannons is that they tend to have larger gaps for the soap and water to pass through in the quick connection, and this allows more water to pass through than soap which can often result in thinner foam coating your vehicle.
To get more foam, you should make this gap smaller. To do this, you need to remove the top piece of your foam cannon and use a wrench to remove the quick connection off of your gun.
With that removed, you can use a flat-head screwdriver to remove the orifice ready for replacement. You can then replace this orifice with a smaller orifice and this will allow you to get more foam out of your cannon.
For the best results, we would recommend replacing it with a 1.1mm orifice, but there are lots of other excellent options that will allow you to get more foam out of your cannon.
Do you scrub after foam cannon?
No, you shouldn’t scrub your vehicle after you use a foam cannon on it. One of the main benefits of cleaning your car with a foam cannon is that it does not scratch the surface of your vehicle.
If you scrub your vehicle after applying the foam you run the risk of scratching the dirt into your vehicle’s surface, so you shouldn’t scrub it. Instead, you should use the foam cannon and then allow the foam to stand for a couple of minutes.
You should then rinse the foam off with water. Once you have cleared the soap, you can then scrub your vehicle with a soap and water solution if you want, but you should never scrub your car’s surface when it is coated with foam from the cannon.
Does foam clean better?
While there are some clear cleaning benefits that foam offers, foam doesn’t necessarily clean better than other cleaning methods. The amount of foam that you use when cleaning also does not have an impact on how well the foam will clean your vehicle, but it definitely is more aesthetically pleasing.
As we have said, one of the clear benefits that foam from a foam cannon has over other cleaning methods is that it allows you to retain the new shine that comes with your vehicle, which can make the paintwork look much nicer than other cleaning methods can.
Cleaning with foam is also often much quicker than other cleaning methods, as it does not require you to scrub the surface of your vehicle. So while cleaning with foam isn’t necessarily better, it does have some clear benefits that other cleaning methods do not offer.
Can you use a foam cannon with a garden hose?
Yes, you can use your foam cannon with a garden hose. This is great as not everyone has a power washer available to them, but it is worth noting that you will not get the same effect with a garden hose as you would with a pressure washer.
To use a garden hose with your foam cannon, all you need to do is hook the foam cannon up to the garden hose in the same way that you would connect the foam cannon to the power washer.
This method works well but there are noticeable differences between using your foam cannon with a garden hose rather than a pressure washer.
The main one being that the quality of the foam will be much more liquidy rather than foamy. This doesn’t impact the foam’s cleaning ability, but it doesn’t look as nice when you are cleaning it.
What is the best chemical guys foam cannon?
Chemical Guys offer a wide range of excellent foam cannons which can be used with your pressure washer to clean your vehicle. One of the best options that they sell is the Chemical Guys EQP_312 which is excellent for cleaning your vehicle.
It has advanced foaming technology which makes your car look like new every time you clean your vehicle with this cannon. It is also constructed for heavy-duty use and is compatible with pretty much any pressure washer which makes it highly versatile.
This foam cannon works best when you use it with a soap that is produced by Chemical Guys but it is also suitable for use with lots of different types of soap. So this is easily one of the best foam cannons that Chemical Guys sell.
What is the soap to water ratio for foam cannon?
One of the hardest things about using a foam cannon is trying to get the soap to water ratio correct. Most soap formulas will need you to dilute them before using them with your foam cannon due to the high concentration.
For the best results, you should aim to dilute a high concentration soap at a ratio of 1:16. So that is 1 part high-concentration soap, and 16 parts water, as this will highly dilute the soap.
If your vehicle is more dirty than usual, you should instead use a ratio of either 2:16 or 3:16 to get your car looking like new again. This ratio of soap will create an excellent foam that will be able to clean your car, and will also be aesthetically pleasing which is a big part of using a foam cannon when cleaning your vehicle.
Should you rinse car before snow foam?
To generate better foam, it is best that you rinse your car with fresh water. When the surface is wet, the foam will be able to work better with your vehicle and create a cleaner look. When it comes to using a foam cannon on your vehicle, water is very important.
Rinsing your car before you use the foam cannon will help it to clean better, but the type of water that you use when diluting the soap is also important.
For the best results, you should use warm water when mixing the soap solution, rather than cold water. Warm water will generate larger suds which will be able to clean your car more successfully.
This warm foam solution combined with the water that is already coating your vehicle from pre-rinsing will improve the cleaning experience and get your vehicle looking as good as new.
Before I Let You Go!
I said what I had to say.
You read my opinion. It is up to you to select a product now.
Everything depends on your budget. Whether you tend to buy an affordable one or a premium one always look for the future that you are looking for.
Use it wisely with proper soap concentration and you are good to go!
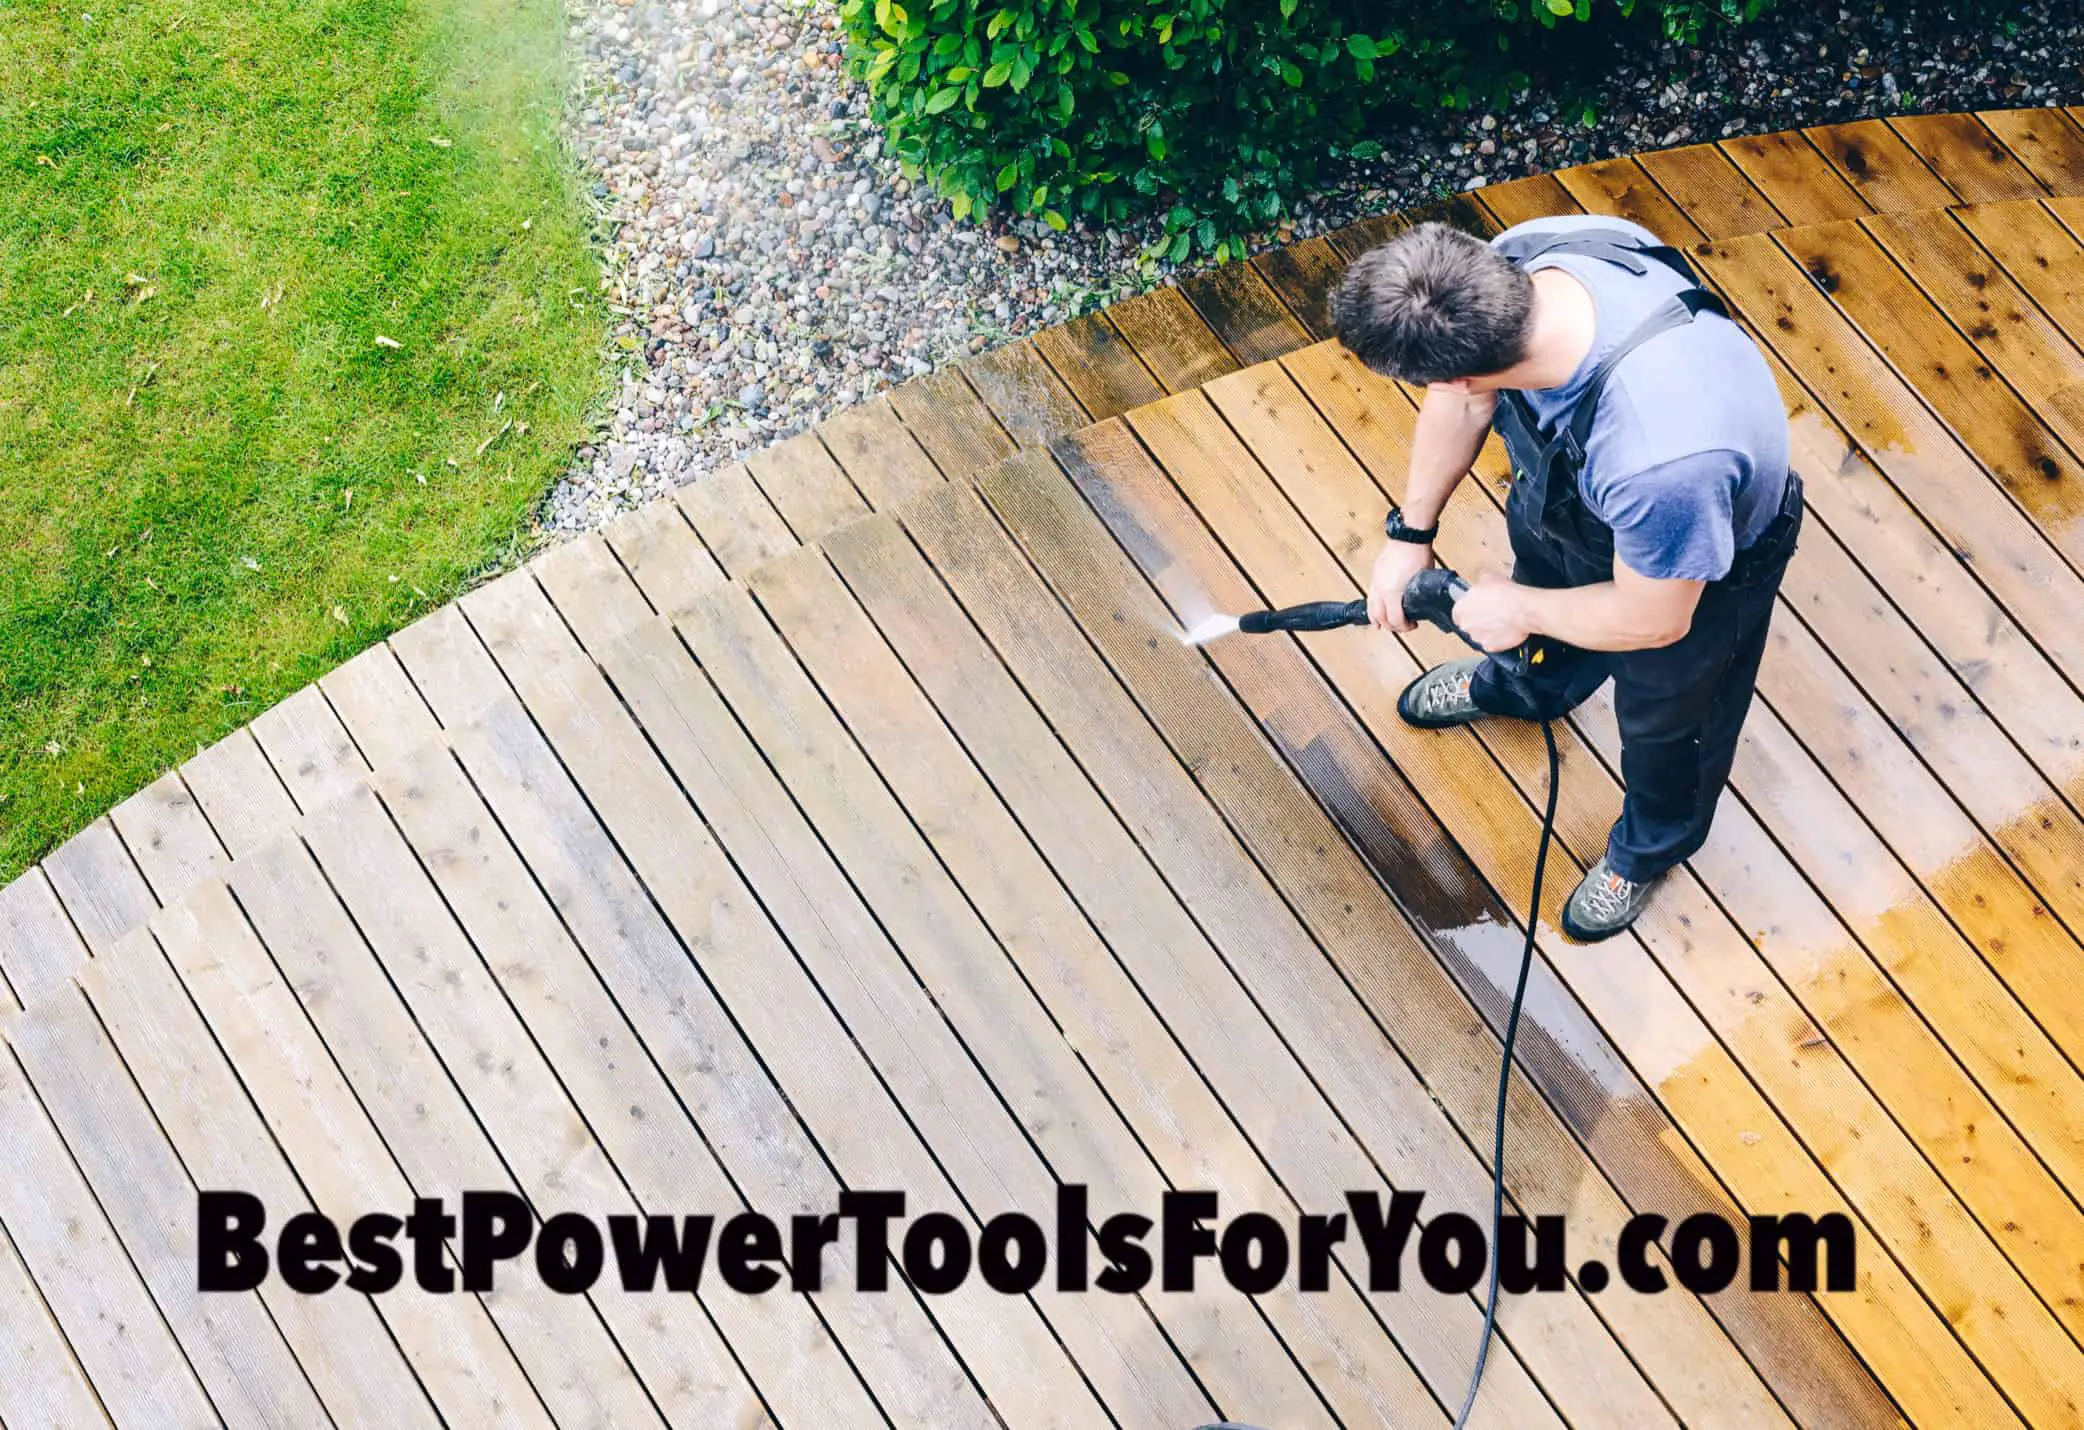
Cleaning the deck? Not so fun… Pressure washing the deck? Oodles of fun:)
Pressure washing your deck before staining is a great way to prepare the wood for stain, in addition to the satisfying clean you get.
If you have a deck then, chances are you already know how hard it is to maintain, but it’s worth it. I think we’ve all been on those ash grey decks that haven’t been taken care of.
Some woods age better than others, but age takes it’s toll on all of us. Just like a nice manicured lawn make our homes feel like home, a well maintained deck helps make our Sunday BBQ’s the best on the block!
man cleaning deck with a pressure washer – high water power cleaner on wooden terrace surface
So here we go, how to pressure wash a deck before staining in 6 easy steps.
Pressure washers take the back breaking out the cleaning equation. We love ’em. And typically they do better work than a chemical based solution (better for mother nature too). But if you fail to use your power washer properly then it just might damage your deck.
It has both the capacity to carve and to clean. We want to leave the carving to those guys with the chain saws at the county fair.
With high pressure and/or setting the nozzle too close to the wood, then it will etch the wood and do some permanent damage. Not structural, of course, but you’ll see it, and probably notice it every time you use your deck there after.
So use your pressure washer with care and don’t get in a hurry (the fan tip will probably be your safest choice).
It is not compulsory to pressure wash your deck before staining, but it will make for a better stain job in the long run.
What is Staining a Deck?
Stain is a coating that both protects the wood and brings out the woods dramatic natural colors and textures.
Your deck honestly faces a lot of stress, whether from the blazing sun to the beating rain to freezing drops in temperature. Wood is beautiful, but only for as long as you take care of it and stain is a great way to do that.
Staining a deck will enhance the beauty of deck on your house and protect it from damage and thus extend the life of your deck.
Three primary ingredients: pigment, solvent, and binder are consisting of a commercial wood stain.
These components work for whether the stain is oil or water based, offer a variety of wood color, both darkening of wood and offering highlights of the grain and natural patterns.
Paint or stain is personal decision of course. With paint your essentially hiding the wood (guess which my preference is;) and stain is more of compliment.
While you can later paint over stain (but do your research first), you can’t stain over paint. Not unless you trade in your pressure washer for a sandblaster and a lot elbow grease.
The Necessity of Cleaning Before Staining
It doesn’t matter whether your deck is brand-new or fully fresh or older and damaged, you really should clean your deck before staining on it.
Cleaning helps your stain to find a better finish and less stain encrusted crud you have to clean up later. New or old, either way it’s best to clean your wood before staining.
Older decks, of course, should be cleaned even more thoroughly as they accumulate dirt and fungi and algae and dust and ect… If you use a finish before and the woods ready, you’re very likely to regret it later.
Advantages of Pressure Washers
It saves you valuable time. Manual washing and scrubbing is the pits.
Pressure washing improves curb appeal.
The operating procedure is easy and human-friendly.
Easily clean the tough grim, dirt, grease from any kinds of outwards or external appearance.
Requires less water and solvents than manual washing, so it is an environment-friendly process.
Takes very little space to store it after washing.
Protects your home from harmful fungi, algae, bacteria etc.
Money. We all need it. We all want to spend it wisely..
Cost depends on its size, condition, type ect… But on average, the cost to power wash your deck as estimated on each square feet varies from $0.25 – $0.45 USD. But cost depends on buying a pressure washer or hiring one temporarily on a daily or hourly basis.
You can clean a deck of about 500 sq.ft. with pressure washing, in about 1 to 1 1/2 hours. This will probably cost between $35 to $70 a day if you choose to rent a power washer
Required water for a regular pressure washer per minute will probably be less than 2 gallons a minute. Less than a garden hose actually, check our our comparison here.
You may decide to use a sealant after removing any mold or mildew. This will cost about $17-$50 per 5 gallons for 300 sq.ft.
How to Pressure Wash a Deck Before Staining
So if you just buy a pressure washer and go to town cleaning with it, you might start to notice that your nice flat wooden board will turn into a shape that looks like a seashell. This,unfortunately is a permanent condition.
A pressure washer is the source of a great deal of power. That’s why we love ’em – right? But it’s easy get injured or do damage if your not paying attention to what your doing or you get in a hurry.
Taking your time could very well save you time in the long run, not to mention money, and health.
1. Safety Measures. The first step is always to avoid serious injuries. Wear a goggles or some form of eye protection. Closed-toe shoes for your piggies. Always keep all body parts out the direct spray. Do not point the nozzle at any person or pet.
Short pants, loose clothing, and jewelry should probably be avoided.
When using a gas power washer, don’t forget the engine gets hot after a time, so be careful when you move it.
2. The Site Should be Prepared, remove all loose debris that is adjacent to the deck. To prevent tripping and tangling hoses you have to remove all related obstacles. Prepare your work area so you can focus on the cleaning job and not be distracted irritating obstacles that slow your work flow . Wind is another distraction at times, so pay attention to the weather.
3. A Cleaner Has to be Applied Wisely. Firstly, follow the manufacturer’s instructions to set up. Check out the washer’s manual option to fix a proper spray pattern for your wooden deck. Now use low-pressure soap-dispensing nozzle and add the solution in the required manner. Then power up the machine and spray solution from top to bottom of the deck.
4. Use a Utility Brush and Rotating Scrub Brush, for typical places and tight corner, use a utility brush to bleach the solution. Utility brush should be synthetic in form and a long-handled. Long handle will help to reach all stubborn dirty place. And a rotating scrub brush is used to remove heavy spots and dirt.
5. Start Rinsing With the Conventional Widest Nozzle, move with the perfect angle with the trigger. A 40 degree to 60-degree tip size is the standard degree of angle from where the water emerges. You have to concern about the pressure you supplied. If you wash with high pressure it will etch the wood surface. The damage is permanent and you cannot overcome it. Use 500-600 psi(pounds per square inch) for softwood, and 1200 psi or less than that for harder wood. Maintain the nozzle 6 feet away from the deck surface.
6. After Successfully Cleaning the Deck power off the Machine and chose an appropriate and your desired wood stain for further beautify it.
Safety
Your deck is probably your favorite place to pass leisure time and to recreation purpose. It’s a neat and clean environment may refresh your mind. To maintain it, regular washing is necessary.
After buying one read through the indicators supplied by the manufacturer because each machine is different.
Always wear safety goggles to protect your eyes from the chemical. Enclosed running shoes, musk, long pants have to wear for protection.
Don’t use a gas pressure washer in confined areas it has the possibility to take carbon monoxide by breath excreted from combustion engines.
Kids not allowed when cleaning operation is running.
If you want to hire a professional cleaner, make sure whether they are well trained or not.
What PSI do I need to wash my deck?
PSI stands for pressure per square inch and is essentially a measure of the strength of the water jets emitted by the pressure washer.
Different material types will be able to withstand varying pressures, so you should check with the manufacturer of your deck for their recommended PSI setting.
If you cannot find the manufacturer’s information, we recommend starting with a lower PSI setting and gradually increasing the pressure.
Softer woods such as pine and cedar will need a lower pressure than harder ones. For soft woods, you are looking at an ideal PSI of about 500 to 600. If your deck is a harder wood such as oak, it can withstand up to about 1,200 PSI.
You should never exceed 1,500 PSI otherwise you can cause serious damage to the deck. This should easily and safely remove all embedded dirt and grime from your deck.
How do you properly power wash a deck?
If your deck is covered in a layer of grime, you can use a stiff-bristled brush and water or a mild detergent first. This will help to break up the layer a little, making pressure washing much easier.
Once you have filled, activated, and tested your pressure washer you are ready to begin cleaning your deck. Hold the wand about 12 inches from the surface of the deck and squeeze the trigger.
Use a side to side sweeping motion to cover the deck and try to cover all areas evenly.
You should move the water jets in line with the grain of the wood, parallel to the direction the boards are laid in. If your deck is particularly dirty, you can use a chemical cleaner containing sodium hydroxide to help make the task easier.
Make up a solution according to the manufacturer’s instructions and apply before rinsing off.
Can you power wash a pressure-treated deck?
Many people choose to use pressure-treated wood for their deck as it is more resistant to insects and rotting. It is also more suitable for use in environments where it will be exposed to moisture. This is due to the inclusion of chemicals in the wood, which have the potential to seep out.
This is a debated issue. Some people do not recommend using a power washer as it can cause damage to your deck and cause the harmful chemicals to seep out into your garden.
Other people advocate for the use of a pressure washer but simply recommend taking caution with the PSI and distance between the nozzle and your deck.
Again, if you are unsure we would recommend checking with the manufacturer for more detailed care instructions. In some cases, using a power washer on your deck can void the warranty, another important factor to check prior to using a power washer.
Is it better to sand or pressure wash the deck?
Many people will recommend both sanding and washing your deck for the best quality clean. If you have a pressure-treated deck, you may wish to just sand it. This prevents escaped chemicals, such as arsenic, from splashing about your garden.
The decision of whether to sand or power wash your deck really depends on your desired outcome. If you wish to re-stain the deck then you should do both processes ideally. You should wait for the wood to dry completely before attempting to sand it.
It is generally advised to perform cleaning of the deck with a pressure washer first. You can add some cleaning solution, stripper, or brightener to the water tank for some extra power.
Sanding can then be done afterward to remove any tough spots. Sanding takes much longer and it is rarely recommended that you sand the entire deck.
Do I need to sand my deck after pressure washing?
As mentioned above, yes you should generally sand your deck after you have pressure washed it. The water causes small splinters of wood fibers to stick up from the decking.
If these are left they could cause splinters and other injuries, or just ruin the aesthetics of your deck. If you are planning on painting or staining your deck, this will help the finish to apply more smoothly.
You should use sandpaper that has a grit of no more than 60 to 80. This is the optimal level of sanding for stain penetration. Higher grits will create a very smooth finish on the wood. While this may sound good, it will not allow the stain to penetrate into the wood.
When sanding, you should always wear protective goggles and a dust mask. This is particularly important for pressure-treated decks as not only would you be inhaling sawdust, but potentially harmful chemicals too.
How do you restore a weathered deck?
The first thing that you need to do is to look at the entire deck for any signs of wear or damage. Pay particular attention to areas that come in contact with the ground, as this is where moisture is likely to gather.
A good method for checking for damp is to stick a screwdriver into the wood – if it sinks then the wood must be replaced. Take this time to check for rusting screws and bolts too.
You should clean your deck at least once per year. You do not need to use a pressure washer for this if there isn’t too much grime buildup. A stiff-bristled brush, deck cleaner, and elbow grease should be sufficient.
If you are going to apply a stain to the wood, you should fill up a sprayer with a brush attachment. Spray stain evenly across the deck surface and use a paint roller to fill in any uneven areas.
If more repairs are needed, such as the railings, these can be done while the stain is drying.
Before I Let You Go!
Restaining a deck is great. Washing the deck is not exactly so easy with manual scrubbing, but using pressure washer is definitely worth the time, money and effort.
In this article, I have tried my best with my personal experience to give you basic information on how to pressure wash a deck before staining. I hope if you follow my instructions, there will be no need to waste your valuable time and money.
And if you wash the deck yourself rather than a professional deck cleaner, then you have to be careful using it. This was just a brief guide, and I hope you guys enjoyed reading it.
Dusting off your mower after a long season of hibernation can have you on tenterhooks. Sometimes, it just won’t start back up again – because you didn’t properly prepare it.
From sticky carburetors to totally destroyed, rain-wrecked engines, leaving your mower exposed the elements is just asking for trouble.
Today we’ll be taking a look at the most frequently asked questions, providing clear concise answers and helping you ensure your lawn mower survives. Because guess what? Winter is coming…
Do you need to winterize a push mower?
Yes! Whilst the process is simpler than it would be for, say, a ride-along mower, there are certain steps you need to take.
Most importantly, you want to ensure it is totally clean and free of clippings, dirt, dust and general debris. Any buildup should be hosed off – be careful not to get the innards wet!
If there’s a gas tank, make sure it is completely empty – otherwise, you’ll end up with a sticky, jelly-like mess that’s impossible to clean out come summer.
Batteries should be removed and stored in a cool, dry place for the winter period, to avoid damage from declining temperatures.
One tip for cleaning a push mower is to place it on its side and use a wire brush or putty knife to gently remove anything stuck to the blade. Do not use your hands!
Where can I put my mower if I don’t have a shed/garage?
Those not lucky enough to have a primo storage spot for their mower – never fear!
There are several suitable storage spots you might not have considered, which will keep it out of the way and safe from harm.
Unfortunately, these are only really solutions for push mowers and smaller units that can be taken indoors easily – sorry to those with the thousand dollar lawn care setups!
Storing a mower in your attic or basement is one suggestion, though only really a consideration if the space is suitable for storage already.
Be sure to wrap the cord well and dust regularly!
Hanging from a hook on the wall is another sensible space saving hack for push mowers, as this stops them from taking up unnecessary room.
On or under a shelf in your pantry or any suitably sized cupboard in the house is also a good call.
With the right weight bearing hook (and installation by someone who knows what they are doing!) you could even hang it from the ceiling.
Be extremely careful with this one, unless you want to destroy your house!
In a pinch, if you really have no choice but to leave your mower outside, covering it with a large, weather resistant tarp can save you from a multitude of sins!
Can I leave gas in my lawn mower over the winter?
We would highly recommend that you don’t!
As we said above, gas left to congeal is incredibly difficult to clean up after several months, and your mower will never be the same.
Not only that, but you could also jam the carburetor, making ignition of the motor next to impossible and also leaving your mower susceptible to rusting.
Some formulas can break down in as short as thirty days, so cleaning out your fuel tank recommended is best practice.
Otherwise, you’ll find yourself needing a new mower much sooner!
That being said, if you add some fuel stabilizer into the mix, things can be different. See below…
Is it better to drain gas or use a stabilizer?
Some mower fanatics believe that completely draining a tank of gas can be damaging, allowing oxygen to infiltrate the carburetor and gum it up.
Similarly, leaving a tank empty for long periods of time can allow water vapor to build up and cause damage internally.
One solution to total drainage is to use a stabilizer, which contains additives that can keep fuel fresh for as long as three years (though stabilizers capable of this can be incredibly costly.)
Don’t just put the stabilizer in and hope for the best, though. You need to briefly run the mower and allow it to permeate the whole system.
That being said, a stabilizer is not one hundred percent foolproof, and you could still be left with a gummed up tank. It’s about proper maintenance and keeping an eye on things!
Can you use too much fuel stabilizer?
Yes – but it isn’t dangerous!. Although using a few drops too many of your chosen stabilizer won’t have drastic effects, it could stop the fuel from being, well, fuel.
Without the ability to properly combust, which adding too much stabilizer can cause, fuel won’t burn and your mower won’t run. That renders the whole tank useless!
That being said, in the event that your stabilizer contains a chemical with de-varnishing properties, using too much could damage the fuel system.
Any thin spots in the material will be degraded, which might lead to leaks and cause bigger problems further down the line.
Put simply, using too much stabilizer won’t ruin your mower if it’s only a little. But if you’ve dumped the whole bottle in accidentally, you’ll probably have to say goodbye to that tank of fuel. Sorry!
How do you store a 2 cycle engine for the winter?
Also known as two-stroke engines, these smaller units are some of the easiest to care for.
First things first, empty your fuel tank – whether you choose to tip it into a gas can or run the engine til the tank’s dry is up to you.
Then get yourself a clean can and mix yourself a proper ratio of gas and oil – 50:1 is recommended, and you should use premium gas where possible.
Only a tiny bit is required – just enough fuel to run the mower for a couple of minutes, so like two or three ounces would be fine. Add a little fuel stabilizer for good measure.
Shake thoroughly to combine the mixture, pour into your mower’s tank and head outside. Run the tank until dry and allow the mower to stop on its own.
This is the most important step: try and start the mower, yanking that cord a good few times; your engine won’t start, but it will try, successfully burning off the last of the oil.
Last but not least, take the spark plug out of the engine – you can find a guide on Youtube for how to do this, or ask someone more clued-up to help.
You’ll only need a wrench and a spark-plug socket to remove it, then you’ll want to lube up the hole once it’s out, pulling the cord again once not to start the engine but coat the cylinder in oil.
Reinstall the spark plug, then properly store your mower away for the winter.
At what temperature does gas freeze?
Between -40 and -200 degrees Fahrenheit, approximately. That is the general answer, but it depends on the type of gas you’re using!
It has to be mighty frosty for gasoline you’d use in a lawnmower to freeze, so unless you live in Canada or an especially cold state, you don’t need to worry.
That being said, you don’t want to leave your mower out in the cold, exposed to the weather and temperature, so be sure to properly store it!
How do you store an electric lawn mower for the winter?
Without taking the proper steps, your electric unit could end up damaged or entirely broken after several months in freezing conditions. Here is our simple, concise guide to properly storing your lawn mower over the cold season:
Clean your air filter – any dust, dirt or debris inhibits the burning of fuel, which leads to more being used overall and could cause more serious problems. Just before storing is a great time to thoroughly tidy it up!
Remove any batteries – once, detached, fully charge the battery and then store it in a cool, dry place it won’t be exposed to heat or moisture, so preferably out of the garage – ensure it is free of dust and the terminals are clear, so it’s ready to rock and roll when summer comes around.
Thoroughly clean the whole mower – be sure to remove any grass clippings, clogs of dirt and grime; don’t touch the blades with your bare hands and wear gardener’s gloves for protection whilst you work. Focus specifically on the cutting deck, as leftover moisture here can cause serious rusting.
Properly wrap cables – don’t wind them too tightly, as this can put pressure on the delicate wiring and lead to fraying or breakage, which means when you try to start it up next it might give you a shock. Too loose and someone might trip, so try and find a good compromise!
Cover the mower with a tarp – any industrial sheet or cover is fine, but just putting the mower away in your garage won’t be enough when it comes to dirt, prying children and – god forbid – rodents! Hide it beneath a good old fashioned tarp for added protection.